You found the wheel. It looks incredible, it is exactly the thing you have been picturing, and it happens to be multi-piece. And then someone on a forum mentions that multi-piece wheels need to be retorqued, resealed, and eventually rebuilt, and suddenly you are wondering whether you are buying a wheel or signing up for a maintenance contract. The truth is that multi-piece wheels are not that complicated. They are, in fact, one of the more logical designs in the wheel world once you understand why the pieces exist and what each one actually does. The intimidation is almost entirely a product of not knowing what is going on under the surface.
For the purposes of this article we will be working through two wheels: a BBS LM, which is a 2-piece forged wheel and one of the most storied multi-piece designs in the enthusiast world, and a Work Meister, which is a 3-piece wheel that represents everything multi-piece construction can do when you take the design constraints off. If you have not read our Understanding Wheel Construction Types article yet, it is worth a quick read first. It covers how cast, flow-formed, and forged wheels are made and touches on why multi-piece exists. This article picks up where that one left off.
Why Multi-Piece Exists
The short version: a monoblock forged wheel is one piece of aluminum, machined from a single billet. It is the lightest and strongest possible construction for an aluminum wheel. The problem is design. You cannot machine a very deep dish and ultra-thin spokes from a single billet without removing so much material that you compromise the structure of the wheel. The spoke pattern you want and the dish depth you want are in direct competition with each other, and one of them has to give.
Multi-piece construction solves this by separating the center from the barrel. The center is the hub, the spokes, and the inner face. The barrel is the outer ring that the tire mounts to. Because they are forged and machined as independent pieces and then bolted together after the fact, each piece can be optimized for its own job. The center can have thin, aggressive spokes because it does not need to structurally bridge to the outer rim. The barrel can be as deep or as shallow as the design calls for because it is not constrained by what can be machined from a single cylinder of aluminum.
Multi-piece construction exists for flexibility in fitment and to build strong wheels that would otherwise be impossible to manufacture. The trade-off is a joint (or two) that needs a bit of attention over time. The rest of the article explains these trade-offs.
2-Piece Construction
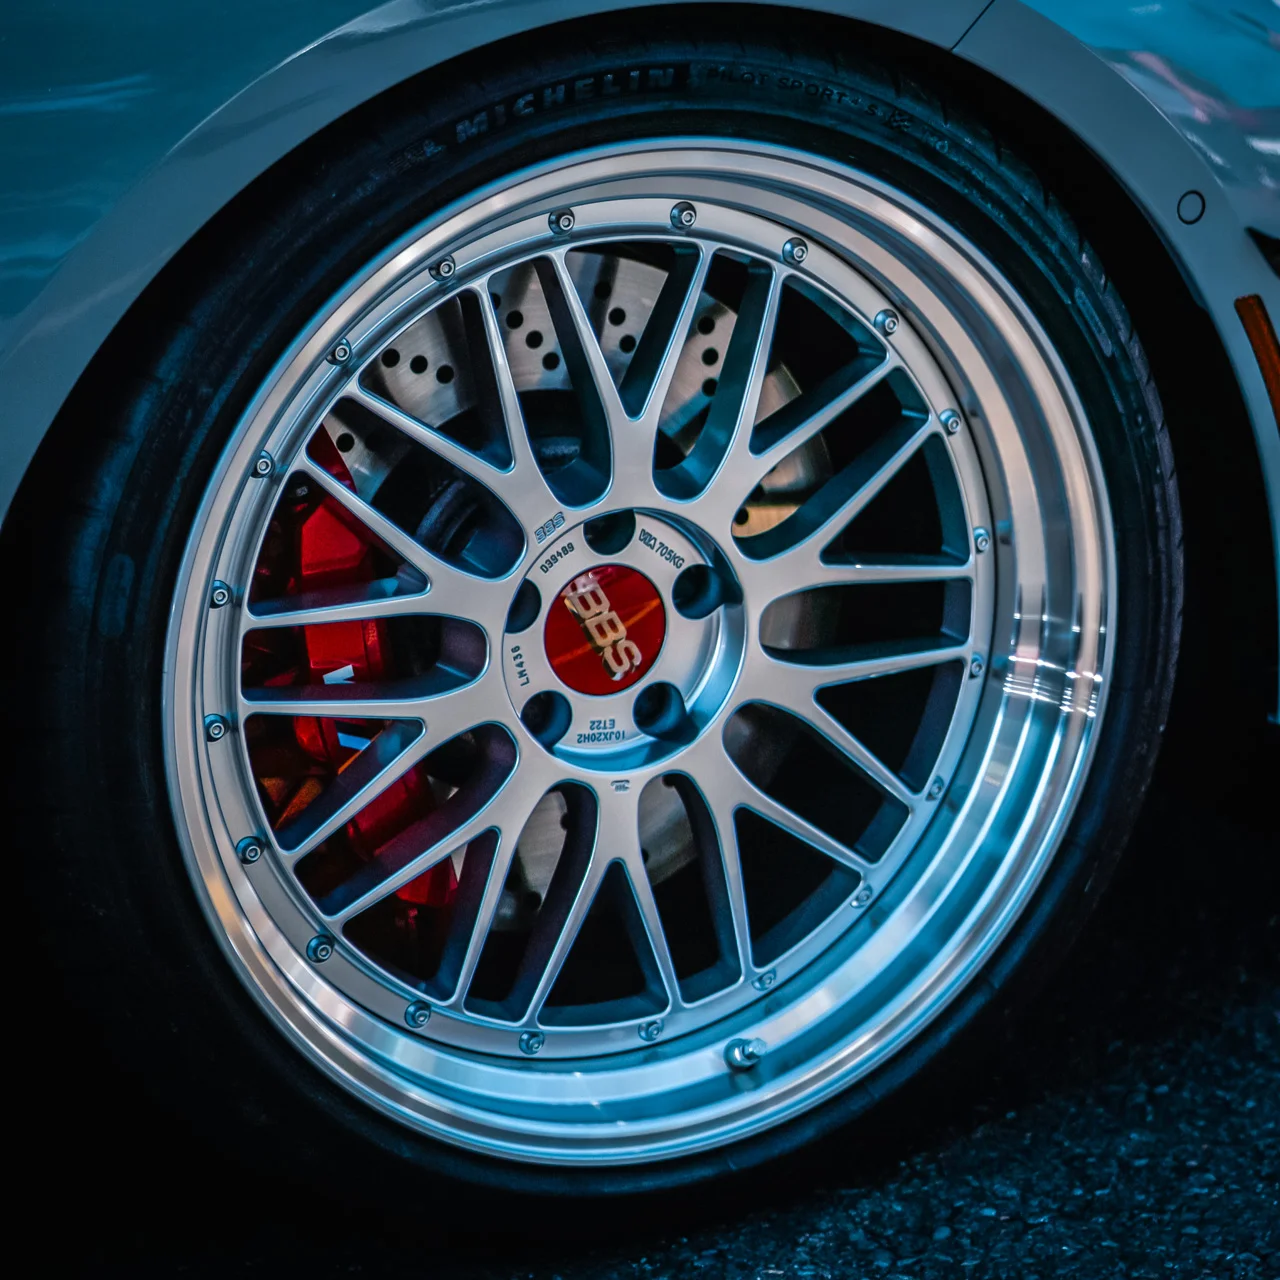
Two-piece is the simpler of the two multi-piece designs and the more common one you will encounter from major manufacturers. The wheel is split into two components: a forged center and a forged barrel. Both pieces are individually forged, individually machined to final dimensions, and then bolted together during assembly. The BBS LM is the textbook example of a two-piece wheel: forged center, forged barrel, and one joint. It has been in production in various forms for decades and has been used in everything from street cars to Le Mans prototypes.
The joint is where the center flange meets the barrel flange around the circumference of the wheel. An o-ring sits in a machined groove at this joint and creates the airtight seal. A ring of assembly bolts runs through one flange into threaded holes in the other, clamping the two pieces together. The bolt preload compresses the o-ring into its groove, the seal holds, and the wheel is effectively one unit.
One thing that surprises people the first time they see the inside of a multi-piece wheel is that there is nothing magical about the joint. It is a machined surface, an o-ring, and some bolts. The magic is in the precision of the machining and the quality of the hardware. A 2-piece wheel with properly torqued hardware and a healthy o-ring is just as airtight as a monoblock.
3-Piece Construction
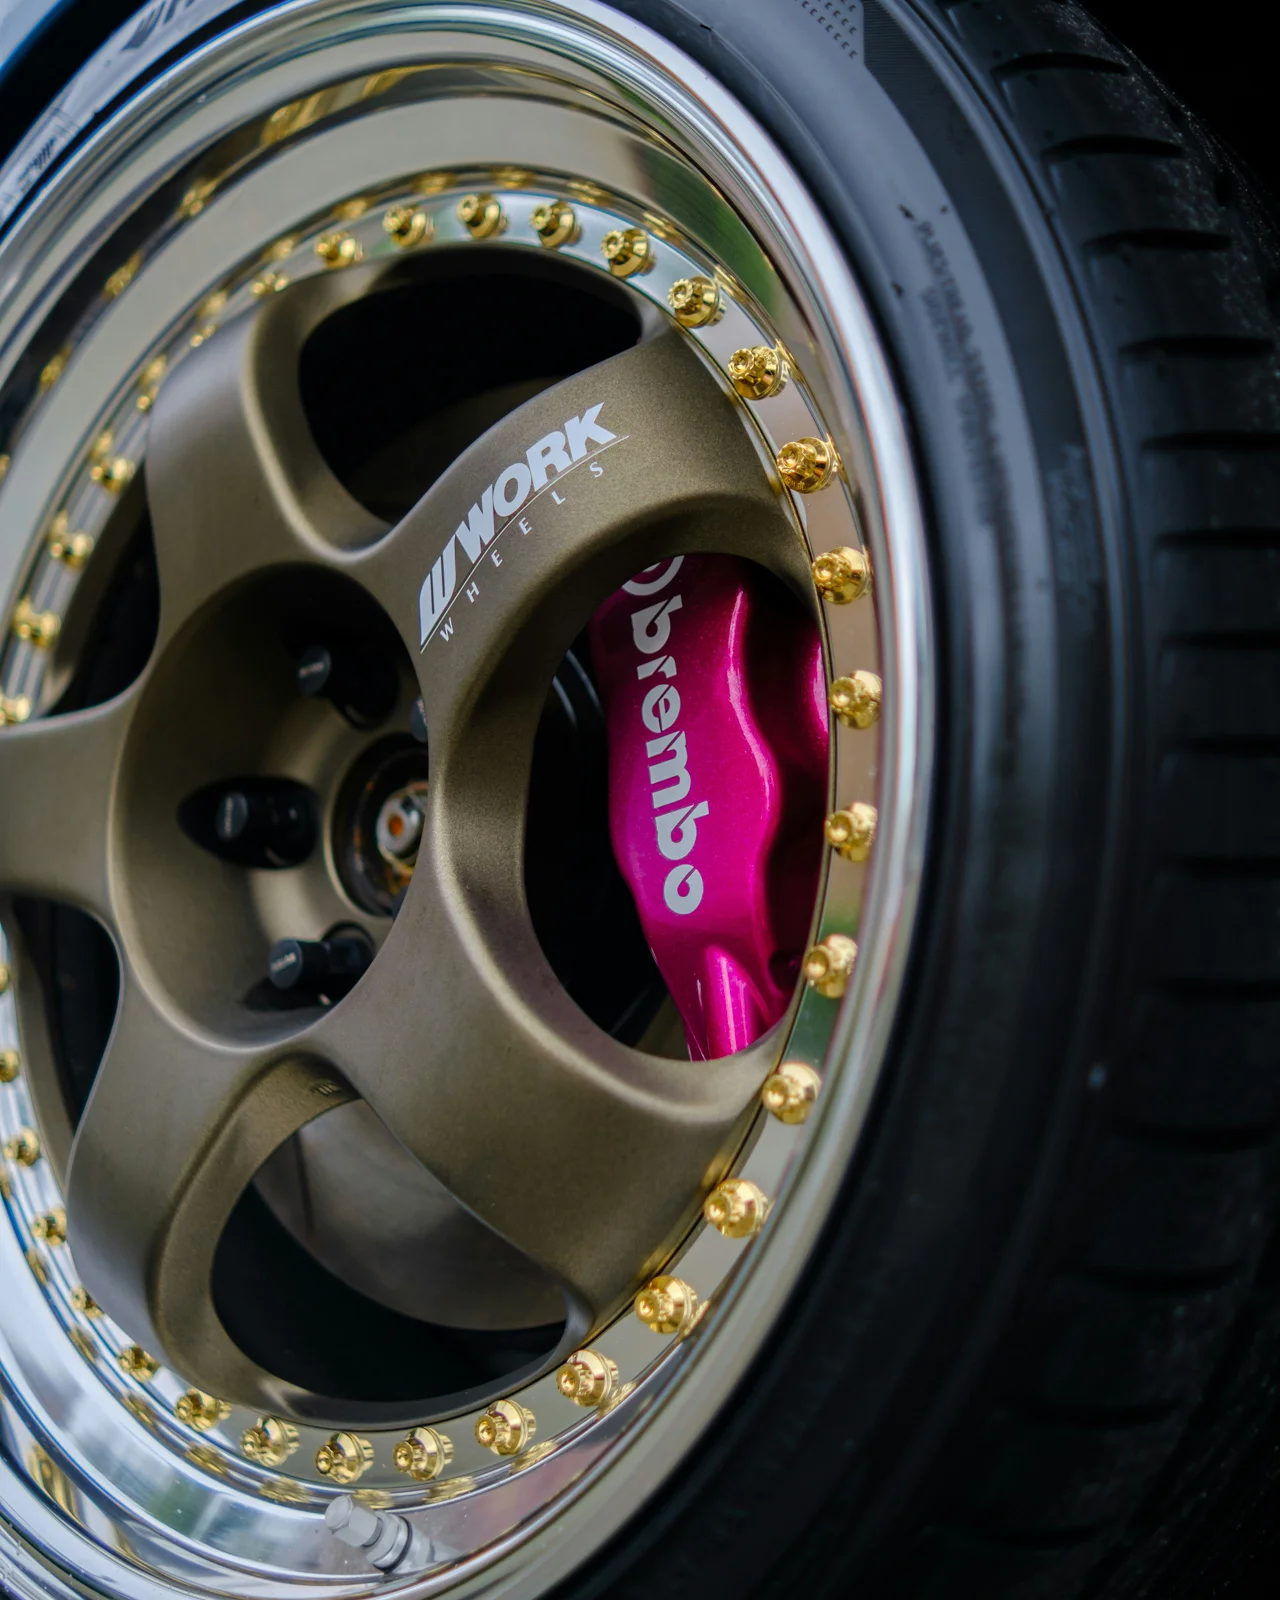
Three-piece wheels split the barrel into an inner barrel and an outer barrel. The center is still its own piece, so you end up with three forged and machined components that are bolted together into a finished wheel. The Work Meister shown above is a well-known example of this construction. Work is one of the manufacturers that has made 3-piece wheels most accessible to the enthusiast market.
The assembly on a 3-piece wheel is the same concept as a 2-piece, just done in two stages. The center bolts to the inner barrel at one joint. The inner barrel bolts to the outer barrel at a second joint. Each joint has its own o-ring and its own ring of assembly bolts. Each joint needs to be sealed and torqued correctly.
The reason anyone bothers with the added complexity is configurability. On a 3-piece wheel, the inner and outer barrel widths are independent variables. You can make the outer barrel wider and the inner barrel narrower or vice versa to land on a specific dish depth and offset that would be difficult or impossible to hit with a single barrel. This is particularly useful for staggered setups where a builder may want significantly more dish in the rear than front.
The second joint is the only real difference between a 2-piece and a 3-piece wheel. Everything else (the hardware, the sealing, the maintenance) works the same way. You just have two joints to keep an eye on instead of one.
Barrel Sizes and Custom Configurations
This is where multi-piece wheels earn their reputation for customization, and where a lot of the configurator magic you will see on manufacturer websites actually comes from. Barrel width is not a fixed dimension on a multi-piece wheel the way it is on a monoblock. It is something you choose, and that choice directly controls the offset and dish depth of the finished wheel.
The center of the wheel is a fixed piece and the variable is how far inboard or outboard the center sits relative to the outer lip of the barrel. A wider barrel pushes the center further inboard, which lowers the offset and creates more dish. A narrower barrel brings the center closer to the lip, which raises the offset and flattens the face. The same center, bolted to two different barrels, produces two completely different-looking wheels with two completely different offsets.
Work makes this configurability explicit. Their online configurator lets you select barrel widths for front and rear independently and shows you the resulting offset before you commit. This is the kind of tooling that only makes sense if the barrel is a separately manufactured piece.
For staggered setups (wider wheels on the rear than the front), multi-piece construction is particularly useful. You can fine-tune the offset on each axle without buying four completely different wheels. Run the same center on all four corners with a narrower barrel on the fronts and a wider barrel on the rears.
One thing worth noting is that you cannot grab any barrel and bolt it to any center. The center and barrel are machined to mate at a specific flange diameter and bolt circle. A BBS barrel will not fit a Work center. Within a manufacturer’s product line, barrels are often interchangeable between models in the same family, but cross-brand or cross-family mixing requires further research.
The Hardware
The hardware on a multi-piece wheel holds the pieces together and keeps the air in. It is worth understanding each component individually because they each have a different failure mode and a different maintenance interval.
Bolts
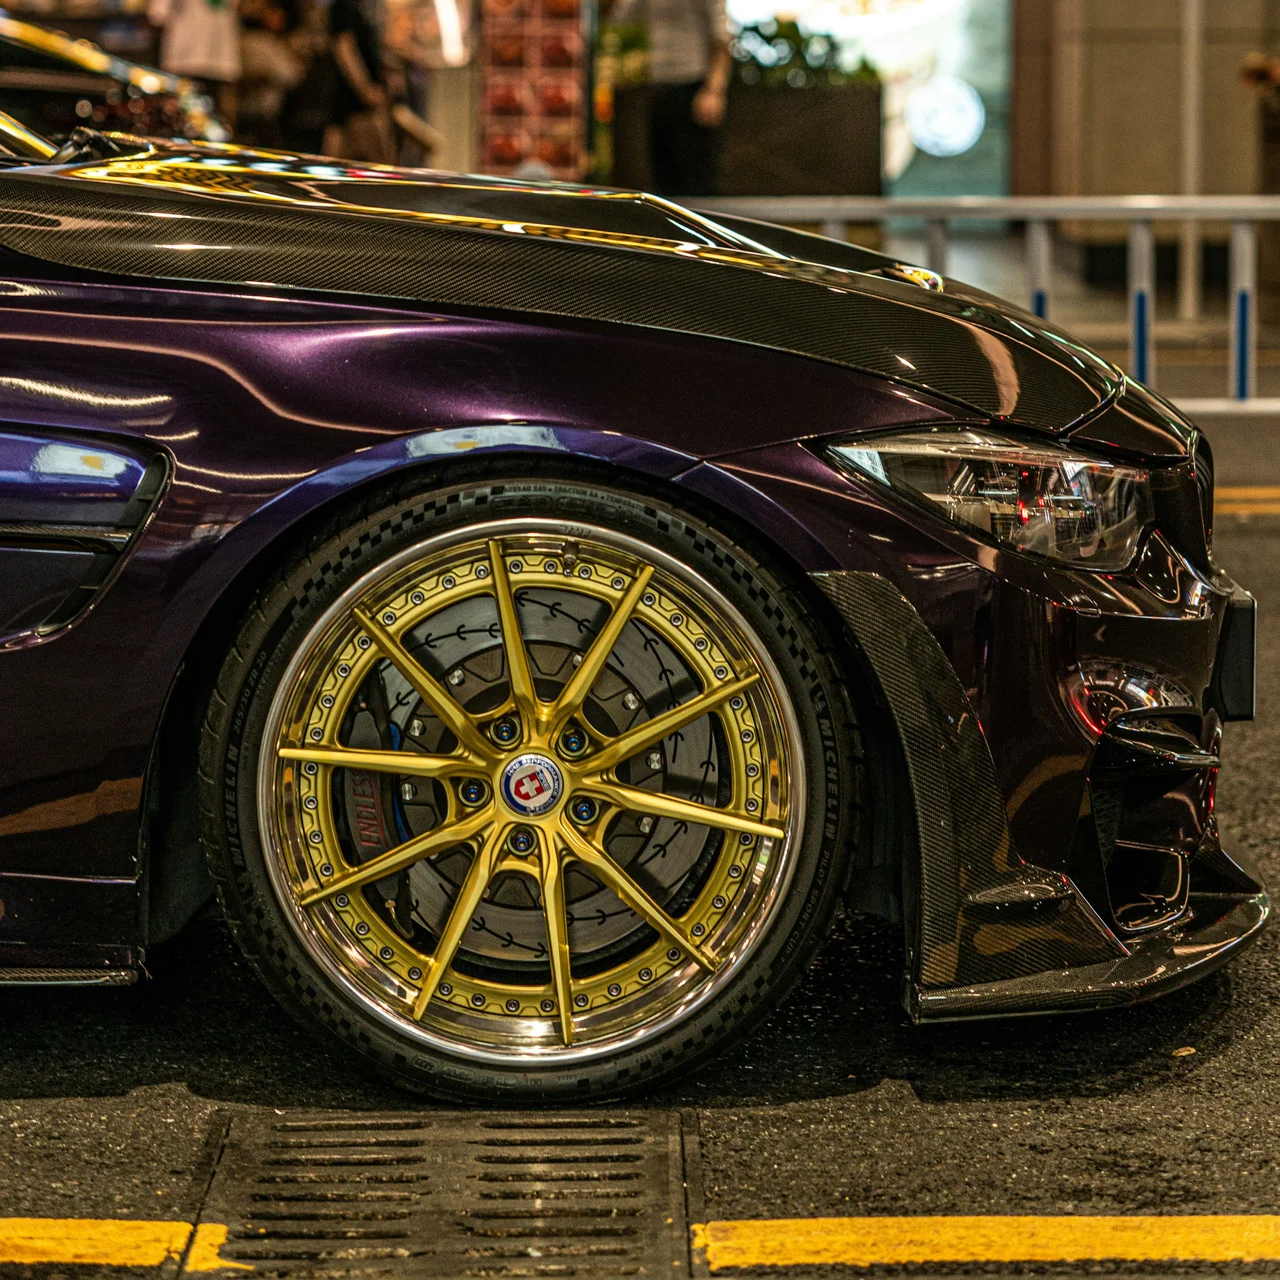
The assembly bolts on a multi-piece wheel are typically high-strength stainless steel on most production wheels, and titanium on higher-end or track-focused builds from manufacturers like HRE. The material matters because these bolts live in a harsh environment. Heat from braking, regular vehicle vibrations, road debris, and moisture all attack your wheel hardware. Titanium adds weight savings on top of strength, but at a meaningfully higher cost per bolt.
Assembly bolts should only be replaced with the manufacturer’s specified hardware. A generic bolt from a hardware store might “fit”, but the bolt needs to be the correct material, thread pitch, length, and grade to clamp the joint with the right amount of preload. If a bolt is corroded or stripped, call the manufacturer or a reputable vendor to order through their parts program. The cost of the correct part is trivial compared to a failed wheel.
O-Rings
The o-ring is the seal. It sits in a machined groove at the mating surface between the center and the barrel(s). When the assembly bolts are torqued, the joint clamps down and compresses the o-ring into the groove, creating an airtight seal. The o-ring is made from a rubber compound designed to resist heat, oil, and chemicals, but it degrades over time. A flattened, cracked, or hardened o-ring is the single most common cause of a slow leak on a multi-piece wheel.
O-rings are inexpensive and should be replaced any time you disassemble a joint. There is no reason to put an old o-ring back in. A new one costs a few dollars and eliminates the most likely source of a future leak.
Sealant
Some manufacturers recommend applying a sealant to the mating surfaces in addition to the o-ring. This is typically a silicone-based product that fills micro-imperfections in the machined surfaces and provides a secondary seal behind the o-ring. Not every multi-piece wheel calls for sealant and some designs rely entirely on the precision of the machining and the quality of the o-ring.
If your wheel’s assembly instructions do not call for sealant, do not add it. Too much sealant can interfere with the o-ring seating properly or make future disassembly messier than it needs to be. Follow your manufacturer’s specification.
Assembly
Assembling a multi-piece wheel is something the manufacturer does at the factory and something you can do yourself if you have a clean workspace, the right torque wrench, and the assembly instructions for your specific wheel. The process is not complicated, but the order of operations matters and skipping steps is how people end up with slow leaks months later.
For a 2-piece wheel the process is as follows. The barrel is laid flat, lip down, on a clean surface. The o-ring is inspected (clean, dry, no visible damage) and seated in its groove. If sealant is called for, it is applied to the mating surface at this point, before the center goes on. The center is placed onto the barrel and the assembly bolts are hand-threaded evenly around the ring. Once all bolts are hand-tight, they are torqued in a star pattern to the manufacturer’s specified value.
A 3-piece wheel follows the same logic but in two stages. The inner and outer barrel halves are assembled first or the center and inner barrel, depending on the design. Each stage gets its own o-ring check, its own sealant application if called for, and its own torque sequence.
Torque the assembly bolts to the manufacturer’s specification. Over-torquing can warp the mating surfaces or crack the flange. Under-torquing leaves the joint loose and the o-ring under-compressed, which is a problem just waiting to happen. The specification should come with the wheel or be available directly from the manufacturer.
Resealing and Retorquing
If there is one section of this article you pay close attention to, make it this one. Multi-piece wheels need periodic attention in a way that monoblock wheels do not, and neglecting it is how a well-maintained wheel ends up with issues.
Thermal cycling is the main culprit. Every time you brake hard, the wheel heats up. Every time the car sits overnight, it cools. Aluminum expands and contracts with temperature, and that expansion and contraction works on the assembly bolts over time, loosening them incrementally. Over months and years the preload on the bolts decreases, the o-ring is less compressed, and eventually the seal starts to fail.
Retorquing is the routine maintenance that prevents this from becoming a problem. On a 2-piece wheel the assembly bolts are on the back of the center flange, so the wheel needs to come off the car. Flip it, access the bolts from the back, and torque them to spec. It takes a socket, a torque wrench, and a few minutes per wheel. On a 3-piece wheel the barrel-to-barrel joint may require tire removal depending on the design. Check your manufacturer’s assembly documentation before you start. Most manufacturers recommend retorquing at least once a year for street use and more frequently for track use.
Resealing is a bigger job and only comes into play if you already have a leak. If a tire is losing air and you have confirmed it is not the valve stem or the tire bead, the next place to look is the assembly joints. Pull the tire, disassemble the joint, and inspect the o-ring. If it is flattened, cracked, or has any visible deterioration, replace it. Clean the mating surfaces while you are in there. Reseat the new o-ring, apply sealant if the instructions call for it, and reassemble and retorque.
The most common problem on a multi-piece wheel is a slow leak caused by a degraded o-ring, and it is one of the easiest problems to fix. It just requires you to actually look at the joint instead of assuming the problem is somewhere else.
Rebuild vs Replacement
Multi-piece wheels can be rebuilt, and rebuilding may be one of the strongest financial arguments for buying one in the first place. A monoblock wheel that is bent or damaged is likely done for. You might find a specialist who can straighten a forged wheel, but if the damage is serious, you are buying a new wheel. A multi-piece wheel with a bent barrel is a different story. The barrel is a separately manufactured piece. You order a replacement barrel in the same width and finish, and reassemble. The center stays. The hardware gets refreshed with new bolts and o-rings while you are in there. On a 3-piece wheel, only the specific barrel half that took the hit needs to be replaced.
This also opens the door to upgrading or reconfiguring a wheel you already own. Want to change the offset on your BBS LM? Order a barrel in a different width. Want more dish on the rears than the fronts? Different barrels, same centers. The wheel looks different and fits differently, but the most expensive component stays exactly where it is.
There are limits to what you can mix and match. A center and barrel from the same manufacturer but different product lines may not be compatible. The flange diameter, the bolt circle, and the thread pattern all need to line up. If you are considering a rebuild or a reconfiguration, contact the manufacturer and confirm compatibility before you order anything. They will tell you exactly which barrels work with your center. Guessing is how people end up with pieces that do not fit.
A new set of multi-piece wheels is expensive. A replacement barrel is a fraction of that cost. The center is where the real money lives, and as long as your center is in good shape, you are working with the cheapest part of the equation when something needs to change.
The Cost of Ownership
Multi-piece wheels are expensive to buy. But the total cost of ownership is a more interesting conversation than just the purchase price, because the cost structure of a multi-piece wheel actually makes it more rational over time than the sticker shock might suggest.
The purchase price is the big number. Work Meister wheels in a custom 3-piece configuration start around $1,000 and cap out around $1,500. A set of BBS LM wheels in a common enthusiast size will run you in the range of $1,500 to $2,000 per wheel. HRE custom build 3-piece sets can run well above $4,000 per wheel. If you are shopping the top-tier manufacturers for a fully custom configuration, the per-wheel cost is going to reflect that.
The maintenance cost, by contrast, is trivial. A set of replacement o-rings is a few dollars. Assembly bolts from the manufacturer might run $50 to $100 per set. A full reseal job at a shop that knows what they are doing will cost a few hundred dollars at most per wheel. If you do the retorquing and resealing yourself, which is entirely within reach if you follow the manufacturer’s instructions, the long-term cost is effectively just the parts.
The place where multi-piece wheels start to look financially smart is on the rebuild side. Replacement barrels, when available from the manufacturer, are a fraction of the cost of new wheels. The center is where the forging, the machining, and the design all live. Centers trade hands for decades on eBay and other marketplaces for hundreds of dollars. The barrel is the primary consumable. If you keep the center in good shape, a damaged barrel means a new barrel, not a new wheel. And even if the barrel is beyond saving, the center has real resale value on its own. The math either way is a lot more palatable than buying a brand new set. This is by design, and it is worth keeping in mind when you are staring at that purchase price and trying to decide whether it makes sense.
You did it. You got to the end. Now you know what actually holds a multi-piece wheel together, why it needs the periodic attention it needs, and why rebuilding one with a new barrel is often smarter than replacing the whole thing. Have a burning question you want answered in a guide? Email us at hello@rimlist.com.